Picasa 3 How to Upload All My Pictures to Google Photos
Google Photos& a cloud storage platform& provides you an power to store all of your photos and videos automatically. They provide you with an easy organizing and sharing power.
The Google Photos app is specifically designed for the way you have photos today. It includes essential features similar shared albums& automatic creations& and an avant-garde editing suite.
Although it provides you lot an easy to employ interface& some find information technology difficult to transfer photos to Google Photos. To make this procedure simple& we are presenting you with a full-fledged guide on how to transfer photos from mac to Google Photos or transfer photos from the computer to google photos or how to transfer photos from the telephone to Google Photos or so on?
Table of Contents
- Office 1: How to transfer photos to Google Photos from iPhone?
- Office ii: How to transfer photos to Google Photos from Android?
- Part 3: How to transfer photos from computer to Google Photos?
Part 1
Part 1: How to transfer photos to Google Photos from iPhone?
It is easy to transfer photos to Google Photos from iPhone. For that& you need to enable the "Fill-in and sync" feature on the Google Photos app on your iPhone.
Once this office is enabled& all of your pictures and videos will be automatically back up to Google Photos. This method will work whether you have enabled iCloud photos or not.
If your iCloud Photos is disabled& then all photos available on your phone will migrate to Google Photos. If it is enabled& all photos& including the photos on iCloud& will exist stored on Google Photos.
Permit us empathise this process by uncomplicated and piece of cake to follow steps.
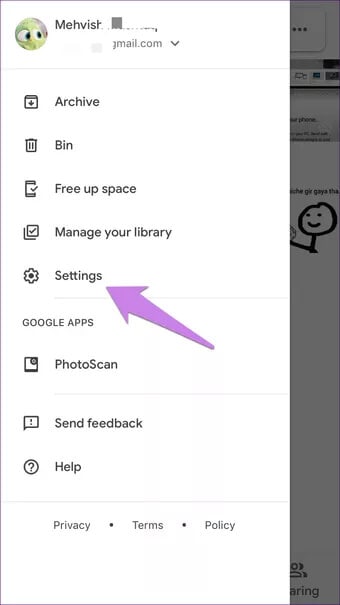
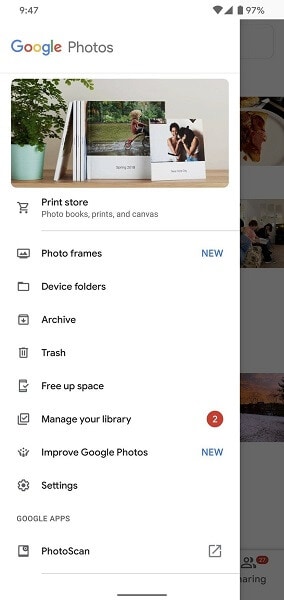
Step 1: Launch the Google Photos app from your iPhone and log in to your account. One time logged-in successfully& tap on the three-bar icon. It will be nowadays at the top-left corner. Now select "Settings" from the carte.
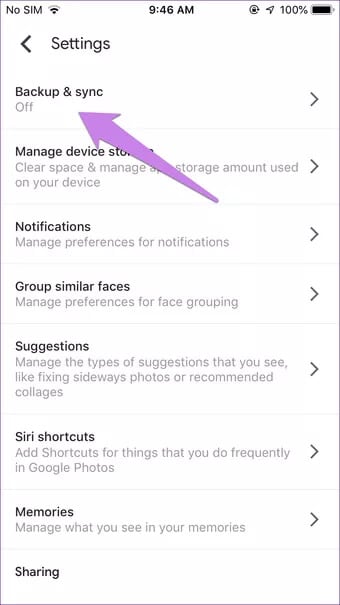
Stride two: Select "Backup & sync" from the given options& as shown below the image.
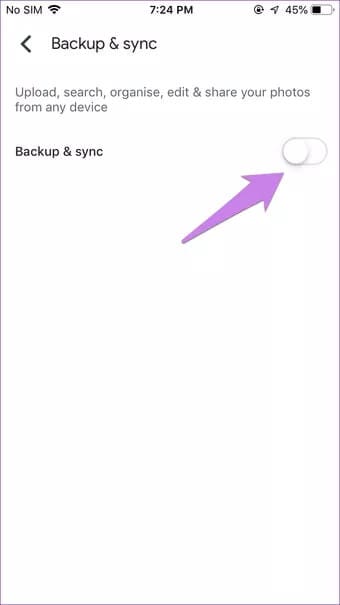
Step 3: Enable "Fill-in & sync". Once enabled& a blue color will fill the box.
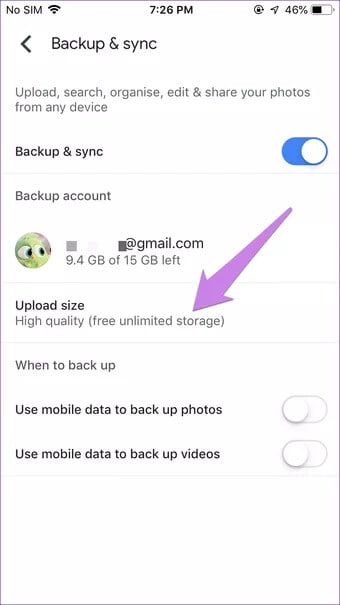
Pace 4: Once this feature is enabled& you will see the upload size option. Tap on "High quality (free unlimited storage)" to get free unlimited cloud storage.
In one case you are done with this& all of your photos and videos will be automatically uploaded to Google Photos. The time taken for this process will solely depend upon the speed of the internet and the size of the data to be uploaded.
Note: Utilize high-speed internet to sync photos and videos. Make sure that your information is adequate to complete the procedure of transferring. If at any stage you end up with data. It may cause an error. It tin can also corrupt your files.
Part 2
Part 2: How to transfer photos to Google Photos from Android?
Android phones are the about widely used smartphones throughout the world. They provide you with a lot of features and apps& amongst which Google Photos are one. Yous can easily move your photos to Google photos on Android.
You lot tin also choose the quality of the images that you want to movement to Google Photos. If you are going with the "high quality"& you will get unlimited storage to support your photos. On the other manus& if you lot plan to movement ahead with the "original quality"& you will even so be able to transfer photos. But you will get express storage.
And so if y'all want to upload a large number of photos for free& you lot can get with the "high quality" option.
If you are wondering how to transfer photos from WhatsApp to Google Photos or motility all photos to Google Photos& y'all need to follow some uncomplicated steps.
Step 1: Log in to your Google Photos account using your id and countersign. Once logged in successfully& you can cull which photos or folders you lot want to move to Google Photos. For this& open Google Photos and tap the overflow icon. It will be with three lines and will be present on the upper-left corner of the screen.
Step 2: Now tap "Settings" as shown below.
Step 3: At present select "Dorsum up and sync".

Pace iv: Now& y'all tin can go to "upload size" to select the photos' quality. You can either choose "high quality" or "Original". Once called& tap on "Support device folders".
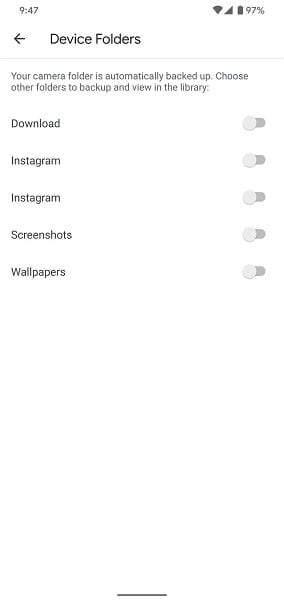
Step 5: Although all of your camera photos volition be automatically synced. If you want to choose other folders from your phone& you can practise this by toggling the folders yous want to transfer. Once you are done with this& all of your selected photos will be transferred to Google Photos.
Note: The process of synching will accept some time. The fourth dimension taken to sync your photos will depend upon the size of the files and the internet's speed. For rapid transferring& it is advised to go with a high-speed data programme.
Part 3
Part 3: How to transfer photos from computer to Google Photos?
We have transferred photos from both iPhone and Android. You must probably be wondering how to transfer photos from mac to Google Photos or how to transfer photos from the figurer to Google Photos or how to transfer photos from the laptop to Google Photos or how to transfer photos from Picasa to Google Photos or so on.
Yous must know this that transferring photos from PC to Google Photos is the same as that of the telephone. The just departure is of steps that we are explaining to you in detail.
Footstep one: Go to google's page and download the "Dorsum upwardly and sync" app. In one case installed successfully& log in to your account using your id and password.
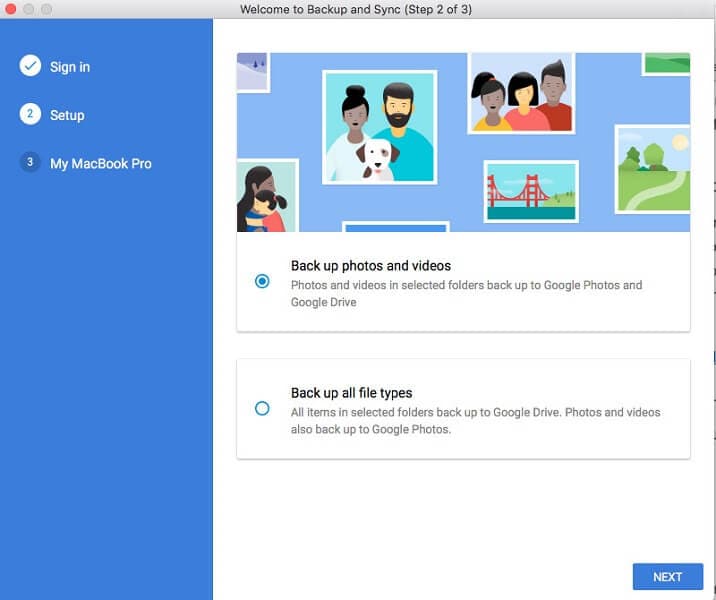
Step 2: Now choose from options of "Support photos and videos" or "Dorsum up all file types". Once chosen& click on the "Next" to continue.
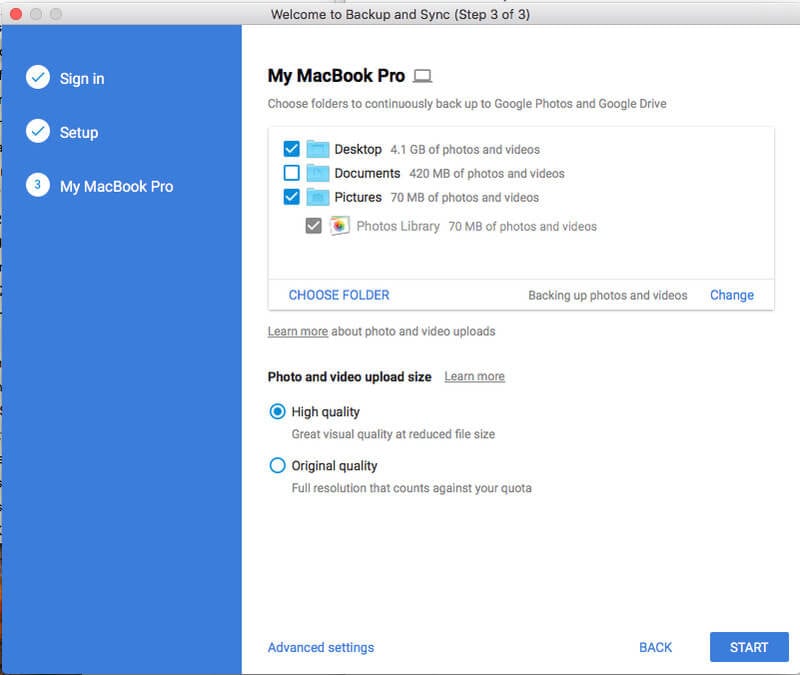
Step 3: At present& select the folders from which you want to upload photos. You can also choose from the given options of "High quality" or "Original quality". "High quality" provides you with unlimited storage for your photos for gratuitous. On the other hand& "Original quality" lets you store photos with original resolution simply provides you with express gratis storage.
Once you are done selecting the folders that yous want to sync& your main task is over. Hither you lot are provided with more options in the form of the "Advanced settings". You lot can click "Advanced settings" at the lesser. This provides you an choice to sync your computer files with your Google Bulldoze. It is a volunteer step that lets you lot sync other files besides photos.
Step iv: Now click on "Start". This volition showtime the automatic process of bankroll up all your selected photos.
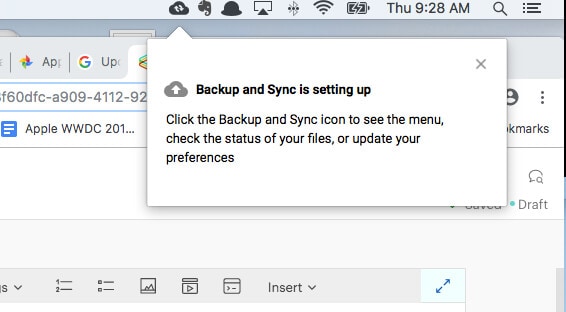
The backing up or uploading process will take time. This time volition depend upon the size of the folders and the internet speed.
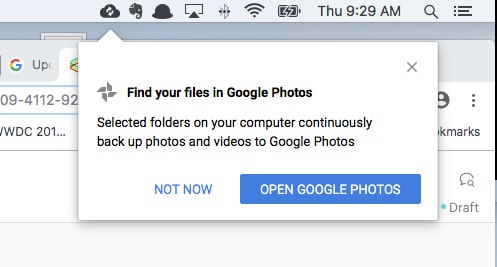
Once this process is completed& you volition be notified by a popular-up window. It gives you the option of opening your google photos. You can click on information technology and view your photos. You are now authorized to use the photos the way you lot want. Suppose you want to view your photos later. You can click on "NOT Now". This will end your chore hither itself.
Conclusion:
Since its launch in 2015& Google Photos has become 1 of the prominent platforms for storing unlimited photos on cloud storage. It is i of the solid media back-ups that you take at your disposal. It let you store photos and videos on deject storage& thus free up your telephone storage. Information technology besides creates a backup that you tin can access anytime from anywhere.
Moreover& when you store your media in "loftier quality" you are provided with unlimited storage space. Most above all& it comes with an easy-to-use interface that lets yous consummate the task of transferring photos from your iPhone& Android telephone PC& laptop& etc. to Google Photos easily.
For providing you more with this& a resolute dossier is presented to you here. All the techniques that are discussed here are trusted and tested. Yous tin can use these techniques as a footstep by step guide for moving photos to Google Photos.
Share
congdonancentiond.blogspot.com
Source: https://inclowdz.wondershare.com/cloud-manage/how-to-transfer-photos-to-google-photos.html
0 Response to "Picasa 3 How to Upload All My Pictures to Google Photos"
Post a Comment